Project set up.
1: Open NetBeans and start a new project (File>New Project).
2: Choose Java Application from the Java menu and click next.
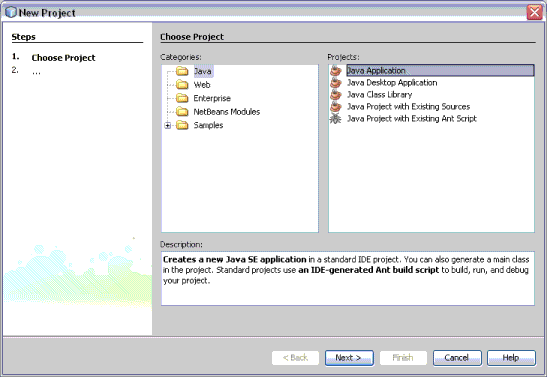
3: Give the project the name simplecc1. Chosee a folder to save it in.
4: We do not want to create a Main Class so if Create Main Class is ticked, untick it.
5: Now we want to add the jax-ws library to the project. We will use jax-ws functionality to connect to the Validate Web Service. Right click on the Libraries container in the Properties tab of your project and choose Add Library
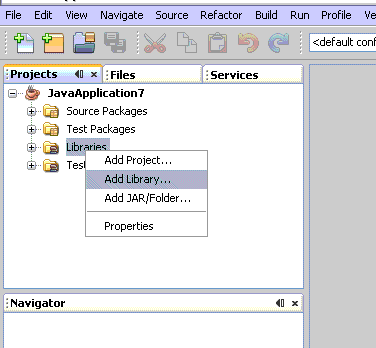
6: Choose JAX-WS 2.1 from the available libraries and click Add Library. (The JAX-WS version in your IDE my be slightly different).
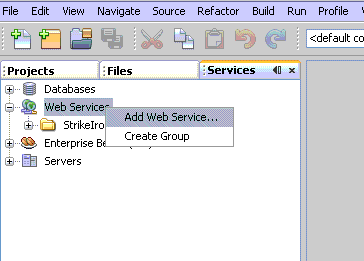
7: Now we will add a reference to the Validate Web Service. Click on the Service Tab. Right click on the Web Services Item and click Add Web Service...
8: Ensure WSDL URL: is selected and enter the URL of the Validate Web Service into the text box.
If you have a local Validate Server the URL will be http:// [ip address]/validatejava/validate.asmx?wsdl
where [ip address] is the ip address or hostname of the local validate server.
https://validate.paygateservice.com/validate/validate.asmx?WSDL
Now rename the package name to validate and click the Add button. After a few seconds the Validate Service will be added to you project.
Under the Web Services item in the services tab you can expand the validate item to see all of the exposed Validate functions available.